- Overview
- Model building
- Model validation
- Model deployment
- Consuming models
- API
- Frequently asked questions
The model does not currently learn directly from user annotations. To improve the performance of the model, modify your prompt instructions or model configuration.
Once you are happy with your prompt instructions, you can start validating the predictions of the model to establish ground truth for its performance evaluation. Before you do so, it is important to understand the differences between predictions and references.
Predictions and references
Predictions are the predicted values, and are compared to ground truth.
Incorrect or missing predictions impact the model score and performance metrics in the Measure tab.
References are the matching references to the predicted values found in the document. The purpose of references is to help users find the right part of the document.
Incorrect or missing references do not impact the model score or performance metrics. However, it might be helpful to add or correct references to improve the human validation experience.
There are known limitations with references and highlighted spans, which are one of our key priorities to improve.
You might encounter one of the following scenarios:
-
Correct prediction and correct reference, but an incorrect span is highlighted. Usually, the first match that was found.
-
Correct prediction, but there is a missing reference and a highlighted span. In these scenarios, we provide a page number as a fallback.
Predictions and references are independent. This means that missing or incorrect references do not impact the predicted values.
Validating extractions
Extractions are highlighted as follows when predicted:
-
Underlined - Predicted values.

-
Filled - Confirmed values.

-
Dashed border - Unconfirmed values.
To validate extractions, follow these steps:
- Go to the Build tab, and select Validate predictions or any uploaded document to begin the validation process. The model highlights the relevant span of text in the document and displays the generated predictions in the side panel. Values that are applicable to multiple extractions, such as account number, have arrow buttons to help navigate to relevant sections. The buttons appear when you point to the values.
The following image depicts what extractions look like in their predicted state. Predicted values are always underlined.
2. Review the predictions and either confirm the extractions one by one or in bulk by confirming the entire field group. It is not recommended to select the Confirm all and next button without carefully reviewing each extraction. The following image depicts:
- in the first table row what extractions look like in their unconfirmed state, that is, values that were once confirmed, but are now unconfirmed. Unconfirmed values have a dashed border.
- in the second and third table rows what extractions look like in their confirmed state, that is, the values that you confirmed or corrected. Confirmed values are always filled.
Any changes you make but do not submit are saved as a draft, which you can return to and update later. For more details, check Draft annotations.
3. You can configure additional fields in your extraction schema at any point from Manage taxonomy or the Build tab.
Example of validating extractions from Action Center
Stopping extraction validation
You are recommended to validate at least 10 examples for each field, so that the model can provide meaningful validation statistics.
Confirmed and unconfirmed references and extractions
The validation process entails the following:
- Confirming the extractions if they are correct.
- Correcting the extractions if they are incorrect.
- Marking fields as missing if they are not present in the document.
- Configuring any additional fields in your extraction schema.
This section shows what extractions and references look like in their confirmed state (validated) and unconfirmed state (not validated).
Any changes you make but do not submit are saved as a draft, which you can return to and update later. For more details, check Draft annotations.
Predicted values
Unconfirmed values
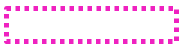
References in the document are highlighted with a dashed border:
Figure 1. Unconfirmed reference
No extractions are marked as confirmed:
Figure 2. Unconfirmed extractions
Confirmed
References are highlighted with a solid border:
Figure 3. Confirmed reference
Extractions are marked as confirmed:
Figure 4. Confirmed extractions
Validated extractions
This section contains example scenarios of when the predictions of the model match or do not match the annotations of the user.
When the annotation matches the prediction, the extraction looks as follows:
Figure 5. Correct prediction
When the annotation does not match the prediction, the extraction looks as follows:
Figure 6. Incorrect prediction
When there is an annotation but no prediction, the extractions look as follows:
Figure 7. Missing prediction
Predictions are compared to annotations, not the references. References might be missing or incorrect, but this will not be flagged as a mismatch.
Correcting extractions
To correct an extraction, proceed as follows:
-
Point to the extraction, and select the pencil icon to edit the predicted value.
-
Enter the correct value.
-
Select the plus
+icon to update the predicted value or reference. -
Highlight the correct value in the document.
Note:Any changes you make but do not submit are saved as a draft, which you can return to and update later. For more details, check Draft annotations.
Editing extractions
In the Validate predictions page, under the Build tab, edit the extractions as follows:
-
Select the plus icon to add a missing extraction.
-
Select the table icon to open the table view.
-
Confirm the extractions either from the side panel or from the table view.
-
Point to the extraction, and use the pencil and plus icons to correct the extractions individually:
- The pencil icon allows you to edit the predicted value and type in the correct value.
- The plus icon allows you to update the predicted value or reference and highlight the correct value in the document.
-
Select Add field group to add a missing field group.
Note:Any changes you make but do not submit are saved as a draft, which you can return to and update later. For more details, check Draft annotations.
Draft annotations
Any edits you make to values and references on a document are stored as draft annotations until you submit them to the model as annotations. As a result, the document statuses appear as In progress.
All of the previously-mentioned actions, such as validating, correcting, and editing extractions, and then submitting the annotations, are kept in draft as you make changes.
If you request new predictions while a document is in a draft state, the system preserves the draft annotations while repopulating new predictions, and matches the new set of predictions from the model to the draft annotations.
- Predictions and references
- Validating extractions
- Example of validating extractions from Action Center
- Stopping extraction validation
- Confirmed and unconfirmed references and extractions
- Predicted values
- Unconfirmed values
- Confirmed
- Validated extractions
- Correcting extractions
- Editing extractions
- Draft annotations