- 概述
- 入门指南
- Activities (活动)
- Insights 仪表板
- Document Understanding 流程
- 快速入门教程
- 框架组件
- 模型详细信息
- 概述
- Document Understanding - ML 包
- DocumentClassifier - ML 包
- 具有 OCR 功能的 ML 包
- 1040 - ML 包
- 1040 附表 C - ML 包
- 1040 附表 D - ML 包
- 1040 附表 E - ML 包
- 1040x - ML 包
- 3949a - ML 包
- 4506T - ML 包
- 709 - ML 包
- 941x - ML 包
- 9465 - ML 包
- ACORD125 - ML 包
- ACORD126 - ML 包
- ACORD131 - ML 包
- ACORD140 - ML 包
- ACORD25 - ML 包
- 银行对账单 - ML 包
- 提单 - ML 包
- 公司注册证书 - ML 包
- 原产地证书 - ML 包
- 检查 - ML 包
- 儿童产品证书 - ML 包
- CMS1500 - ML 包
- 欧盟符合性声明 - ML 包
- 财务报表 (Financial statements) - ML 包
- FM1003 - ML 包
- I9 - ML 包
- ID Cards - ML 包
- Invoices - ML 包
- InvoicesAustralia - ML 包
- 中国发票 - ML 包
- 希伯来语发票 - ML 包
- 印度发票 - ML 包
- 日本发票 - ML 包
- 装运发票 - ML 包
- 装箱单 - ML 包
- 工资单 - ML 包
- 护照 - ML 包
- 采购订单 - ML 包
- 收据 - ML 包
- 汇款通知书 - ML 包
- UB04 - ML 包
- 水电费账单 - ML 包
- 车辆所有权证明 - ML 包
- W2 - ML 包
- W9 - ML 包
- 其他开箱即用的 ML 包
- 公共端点
- 流量限制
- OCR 配置
- 管道
- OCR 服务
- 支持的语言
- 深度学习
- 数据与安全性
- 许可和计费逻辑

Document Understanding classic user guide
分类管理器
In case you use an Intel Xe GPU and Taxonomy Manager is not displayed properly, we recommend updating the graphics driver to the latest version. For more information, please visit this page.
The Taxonomy Manager can be used to create and edit a Taxonomy file specific to your current automation project. This Taxonomy file contains user-defined document types, organized in Groups and Categories.
You can further use the Taxonomy file by converting it into a.NET data type with the Load Taxonomy activity, and then passing it as input for activities such as:
只有在安装 v1.6.0 或更高版的 UiPath.IntelligentOCR.Activities 包作为项目依赖项后,才能访问分类管理器。包安装完成后,“向导”部分的功能区中会显示“分类管理器”按钮。

使用分类管理器
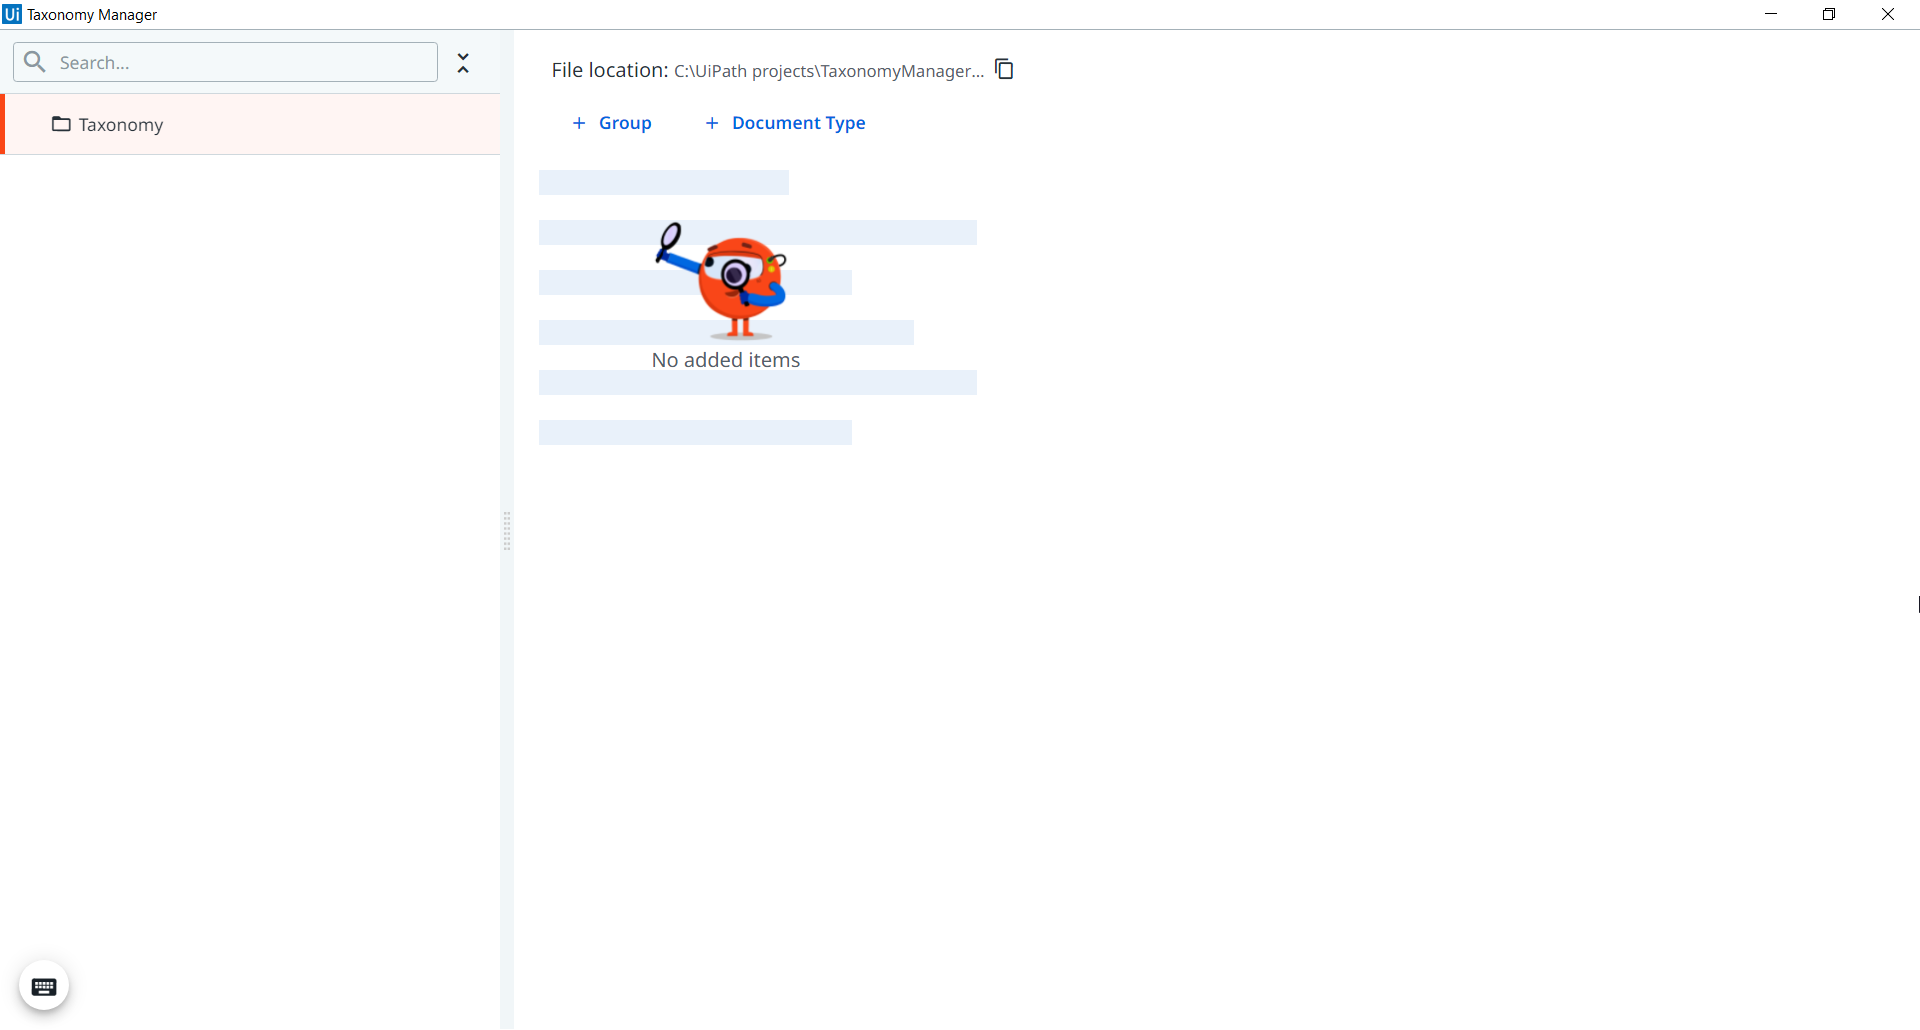
“分类管理器”窗口用于创建按组和类别组织的文档类型。首次在项目中打开“分类管理器”时,系统不会定义任何组、类别或文档类型。
Figure 1. The Taxonomy Manager before mapping any document types or fields
建立结构
第一步是创建组或文档类型。两者之间的区别在于,组涉及层次结构,而文档类型可以创建为单个文件。复杂的项目意味着创建组、类别和文档类型,而简单的项目只能要求创建一种或两种文档类型。
创建组
When a group is created, a category is also necessary for the document type you want to create inside the group. This is done by using the Group button. Once you have chosen a name for your group, you can save it by using the Save button or by using the Enter key.
创建类别
Once a group is defined and selected, you can create a Category and/or a Document Type within the group, by using their defined buttons. Select Save or use the Enter key to save the configuration.
创建文档类型
A Document Type can be created either as part of a group or as a single document. When created inside a group, make sure that the group is selected, then select Document Type.
If the Document Type is created as a single file, make sure that no group is selected and select Document Type. After selecting Document Type, enter a name for the file and select Save.
When a Document Understanding Action is submitted from Orchestrator while using Studio version 2020.10, make sure that the taxonomy has no document types created without a category.
Selecting an already created Document Type lets you change its name, copy its unique ID to clipboard, or reassign it to another group or category. You can also input a code for the document type.
Once a document type is saved, a Document Type ID is generated for it. Opening the document for editing displays the ID next to the Document Type Name tab. The Document Type ID has a structure of the type Group.Category.Document and can be copied to the clipboard. The Document Type ID code is an optional functionality and it can be used to find your documents or map your documents to the Document Types that you define in the taxonomy.
配置文档类型的显示设置
After you create the document type, you can configure its display settings. Select the document type in the Taxonomy Manager, and go to Display settings. You can change the following configurations:
-
OCR confidence threshold: Set a minimum confidence threshold at the document type level. When the document is displayed in the Validation Station, both the OCR confidence level and the Extraction confidence level for a field, would have to be higher than the threshold you configure in the Taxonomy Manager. The default value for OCR confidence threshold is 90%.
-
Date display format: The date format displayed for the document type.
默认值为
YYYY-MM-DD。 -
Number decimal separator: The number decimal separator you want to use for the document type.
-
Number thousand separator: The number thousand separator you want to use for the document type.
创建字段
When the Document Type is selected, the Field button becomes available to create a new field. Once the Field button is selected, you can enter a name for it and select its type from the dropdown list.
The Field category has two tabs: Details and Rules. The Details tab provides information about the selected field, such as Field Name, assigned hotkey, or field type, while the Rules tab allows you to create rules that need to be fulfilled by the extraction result for the field.
提供以下字段类型:
- 文本
- 数字
- 货币量
- 日期 - 选择此类型后,便可指定预期格式(可选)。
备注:
If you want to add an expected format, use an MSDN (MicroSoft Developer Network) compliant format. This format may be used by extractors and is used by the Data Extraction Scope activity when trying to parse a Date into its constituent Day, Month, and Year parts.
- 名称
- Address
- 设置 - 选择此类型后,即可从预先建立的列表中向字段添加多个值。
- 布尔值
- 表格 - 选择此类型后,便可编辑表格结构,其中包括添加列及编辑列名称和类型。
- FieldGroup - Choosing this type enables you to display hierarchical field structures in Validation Station, allowing logical organization of extracted data. FieldGroups preserve the hierarchical structure of extracted data, making large, multi-page document packets easier and faster to validate.
详细信息选项卡
After the new Field is created, select it to view more information. By default, when you open a field, the Details tab is displayed allowing you to modify the name, color, or hotkey of the field. You can also specify whether it is multi-value (Is multi-value) or if it allows for values with no evidence in the document to be processed (Requires reference). The multi-value option allows for a field to have multiple values, without being restricted to a specific list.
有关如何使用这两个字段的更多信息,请查看以下说明:
- 为多值:如果某个字段设置为多值,则可以为该特定字段报告多个值。例如,您想要提取一个“总监列表”,其中的条目数量不定。想象一下像单列表格这样的多值字段。
- 需要引用:当需要引用字段时,仅当您从验证站点中看到的文档中选择某些内容时,才可以为其添加值。对于要捕获可能在文档中不可见的值的特殊字段,您可以将“需要引用”切换到“关闭”。这样一来,用户即可添加值,而无需在文档中指定该值的来源位置。
You can also select the Type of the field from the dropdown list, or add a Default value. Use the Default value field to define values to be populated in the Extraction Result, in case there is no value for the field identified in the document.
验证设置
Under Validation settings, you have the option to set an Extraction confidence threshold. This threshold is considered when validating the field in the Validation Station. To set an extraction confidence threshold, go to Extraction confidence threshold and input a value ranging from 0 to 100.
Figure 2. Overview of the Details tab of a field
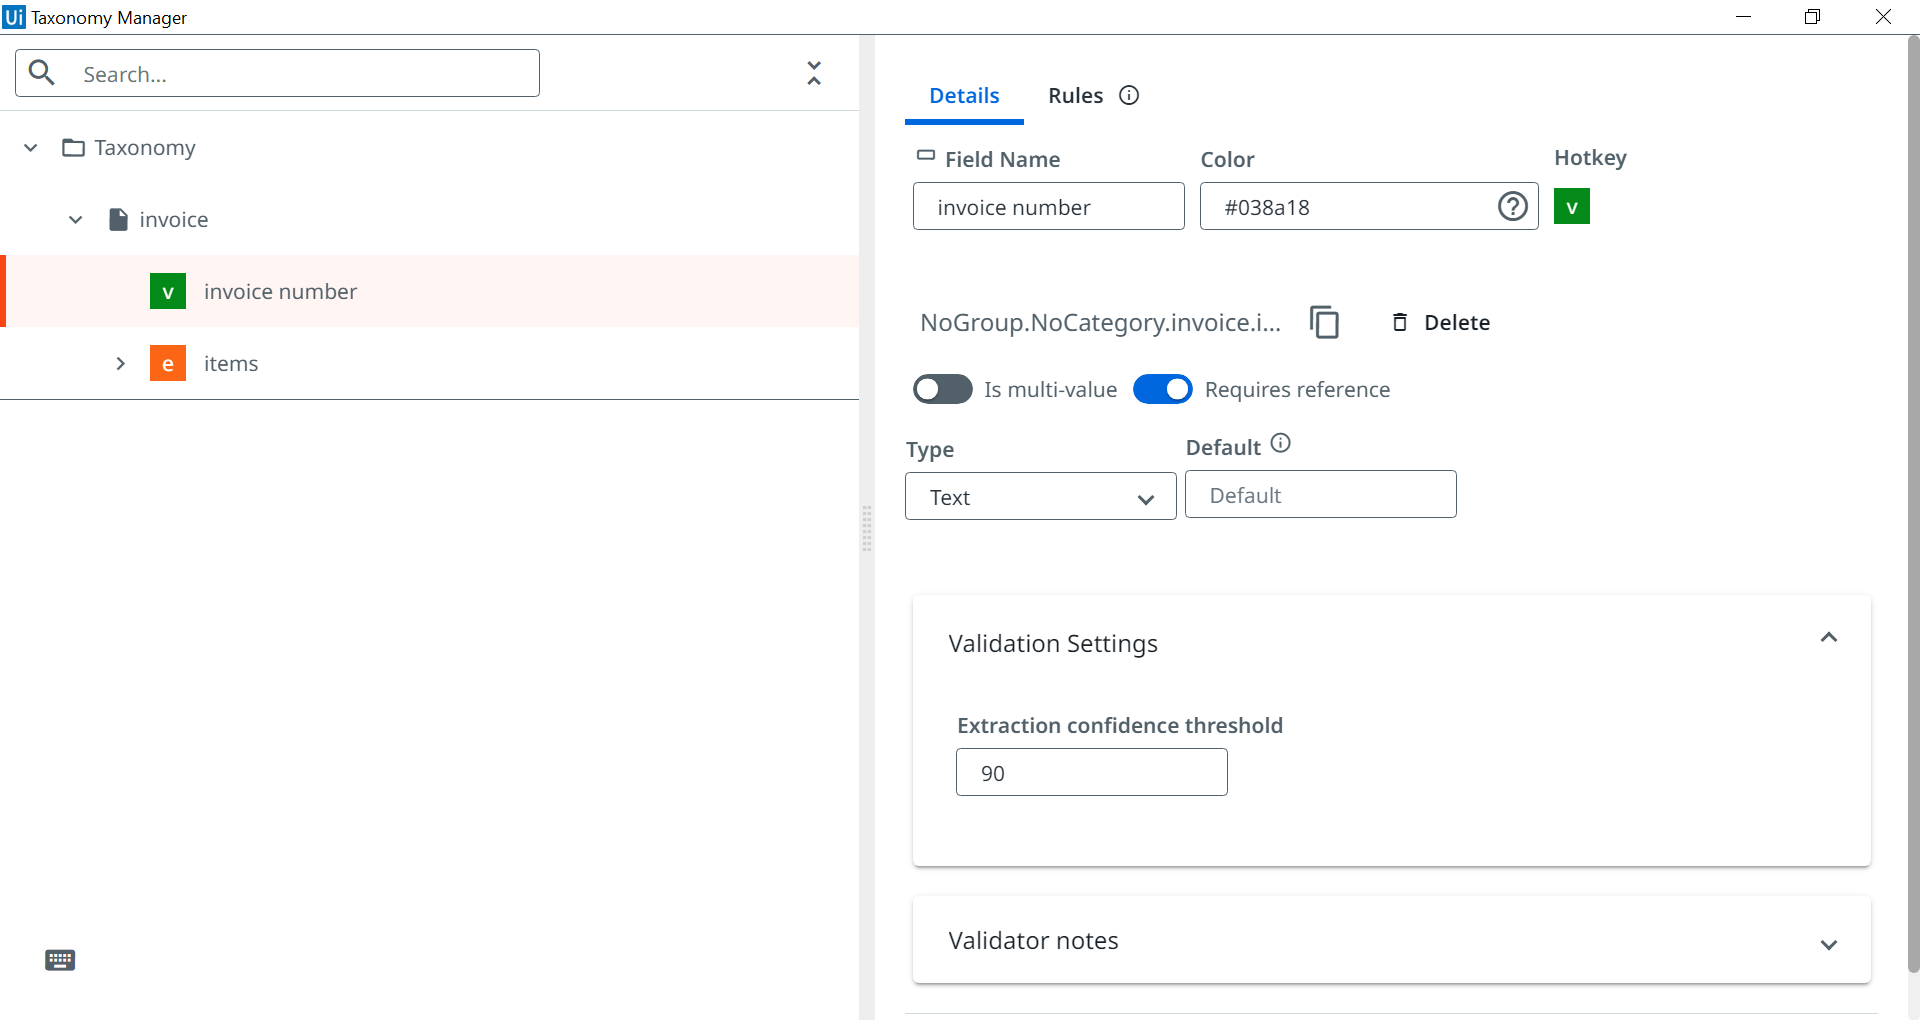
You can choose to enable Validator notes from the Details tab. By setting up validator notes, human validator can add notes about the decision they have taken during validation. You can configure the following settings:
- Read-only: If enabled, the human validator can view any validator notes set on the ExtractionResult field in Validation Station, as a message. If disabled (default state), the human validator can also edit that note in Validation Station and thus communicate back to the robot information about the decision taken.
- Text: If Text is selected, the validator note is displayed as a text message (or editable text when editing is enabled) in Validation Station. The human validator can view, edit, or add a maximum of 200 characters message in Validation Station.
- Options: If you select Options, you can configure a series of radio buttons that the human validator can view and, if not read-only, select in Validation Station. You can add a maximum of 10 options.
提示:
Check the ExtractionResult Class page from the UiPath.DocumentProcessing.Contracts section for more information on the two methods related to validator notes,
GetFieldValidatorNotes(<fieldId>)andSetFieldValidatorNotes(<fieldId>, <validatorNote>).
可以使用旁边显示的“删除”按钮删除已创建的字段,也可以使用拖放功能对其进行重新排序。
A field can also be deleted from the Details window, by selecting Delete.
重复以上步骤即可创建多个组、类别和文档类型,您后续还可使用“搜索”字段对其进行筛选。
规则选项卡
字段规则可帮助您优化提取结果,并在运行工作流时自动对其进行验证。它们的作用是提高提取效率,并通过高亮显示来帮助您轻松验证需要在验证站点中注意的字段。您可以创建适用于一个字段的多个规则。
You define a rule by setting the Evaluator type and the Criticality level.
评估者类型
Use the Evaluator Type to specify how the defined rules should be evaluated. There are two evaluator types that you can choose from: AND, OR.
| 评估者类型 | 描述 | 示例 |
|---|---|---|
| AND | 当需要执行所有规则时,请使用此赋值器类型。 | Rule : Invoice Number starts with A And ends with X.
|
| 或 | 只需执行其中一个规则。 | Rule : Invoice number starts with A OR is 123.
|
严重性级别
Indicates the criticality of all rules defined for a field. You cannot set a MUST level if the rule is broken in the Validation Station session. There are two criticality levels that you can choose from: MUST, SHOULD.
识别出设置的严重性级别后,将触发创建的规则。
When you want to submit a rule, a MUST rule requires 100% success, otherwise the Submit operation fails. A SHOULD rule allows you to Submit it even if the rule is broken.
You can always check if a rule is broken by using the helper method from the ExtractionResult Class class, that resides in the UiPath.DocumentProcessing.Contracts activity package.
Table 2. Table displaying Criticality levels and their descriptions
| 描述 | |
|---|---|
| MUST | 当创建的规则必须包含在“提取结果”流程中时,请使用此严重性级别。 |
| SHOULD | 当创建的规则是可选的时,请使用此严重性级别。 |
Once you have selected the Evaluator Type and the Criticality Level, you must set a type applicable for your newly created rule. There are several options you can choose from. Here's a complete list with all the available ones:
- 不为空
- 可能的值
- 开头为
- 结尾为
- 包含
- 定长
- 是电子邮件
- 正则表达式
备注:
The field type for which you created a rule dictates the number of possible rule types from which you can select one. For example, a field of type Text displays all the possible rule types, while a field of type Date displays only two rule types, Is not empty and Possible values.
规则类型
下表显示了每个可用规则类型的详细信息,并根据严重性级别和评估程序类型进行分类。
| 描述 | 字段类型 | 严重性级别 | 评估者类型 | |
|---|---|---|---|---|
| 不为空 | 提取的值不能为空,这意味着该字段为必填字段。 如果缺少该值,则需要验证/手动输入。 | 适用于以下类型的字段:
| MUST SHOULD | AND 或 |
| 可能的值 | 用户定义所有可能的值,提取的数据是创建规则时作为输入添加的值之一(例如,员工类型为“全职”、“兼职”或“实习生”)。 | 适用于以下类型的字段:
| MUST SHOULD | AND 或 |
| 表达式 | 定义用作提取数据规则的数学表达式。 | Applicable to fields of type number. A condition is required while configuring the rule. Choose one of the following options:
| MUST SHOULD | AND 或 |
| 开头为 | 这是一个固定规则,这意味着提取的值需要以用户添加的其中一个值开头。 | 适用于以下类型的字段:
| MUST SHOULD | AND 或 |
| 结尾为 | 这是一个固定规则,意味着提取的值需要以用户添加的其中一个值结尾。 | 适用于以下类型的字段:
| MUST SHOULD | AND 或 |
| 包含 | 这是一个固定规则,表示提取的值需要包含用户添加的其中一个值。 | 适用于以下类型的字段:
| MUST SHOULD | AND 或 |
| 定长 | 这是一个固定规则,意味着提取的值需要具有一定的固定长度。 | 适用于以下类型的字段:
| MUST SHOULD | AND 或 |
| 是电子邮件 | 这是一个固定规则,表示提取的值需要以电子邮件格式写入。 | 适用于以下类型的字段:
| MUST SHOULD | AND 或 |
| 正则表达式 | 这是一个固定规则,意味着提取的值需要包含与用户添加的其中一个值相似的正则表达式。 | 适用于以下类型的字段:
| MUST SHOULD | AND 或 |
使用规则
Let's take a practical example to better understand the applicability of these rules. We will create a set of rules for the Address field of document. Check the following example steps to learn how you can create a new rule or a set of rules for a field:
- Select a field in the Taxonomy panel.
- Go to the Rules tab.
- Select Add new, to add a new rule.
- Type in the
full addressrule, for which the Type is Contains, and the Expression isst, str, street. - Choose the Evaluator type. In this example, select OR.
- Choose the Criticality level. In this example, select MUST.
- Select Add new.
- Type in the
phone numberrule, for which the Type is Is not empty. - Select Add new.
- Type in the
city or staterule, for which the Type is Contains, and the Expression iscity, state.
以下动图显示了前述步骤。
图 3. 显示如何为字段添加三个规则的动图
其他选项
正在编辑
您可以“编辑”已创建的任何组、类别或文档类型的名称。这可以通过选择三个配置级别中的其中一个级别,然后编辑“名称”字段来完成。
正在删除
您也可以删除组、类别和文档类型。有两个可用选项:
- Select Delete
 , at the parent element of the object you want to delete.
 - Select Delete
 while selecting the object you want to delete.
In both cases, a pop-up is displayed asking you to confirm the deleting action. Select Delete to approve the action.
自定义和辅助功能
热键和颜色会自动分配给新创建的字段。您可以使用它们来提高可见性并更快地浏览分类。通过单击热键或颜色代码字段来自定义它们。
A customized field with color and hotkey can instruct the Validation Station and the Template Manager to use the assigned color when displaying the field and to use the assigned hotkey as a shortcut for providing values to fields. See the Validation Station page for more information about how to use the field shortcuts to assign values to a field.
To assign a color and a hotkey for a field, select the field, and choose a certain color code in the Color field, and then select a specific hotkey from the Hotkey menu.
Navigate through the Taxonomy Manager by using the keyboard shortcuts. Select Show available keyboard shortcuts and activate the Toggle keyboard shortcuts option to avoid the accidental triggering of the keyboard shortcuts. Nodes can also be collapsed.
您在分类管理器中所做的更改将自动保存到特定于项目的 taxonomy.json 文件中。